I've heard rumors of this thing called "fall" that should be showing up sometime in the near future. I hope it comes soon! Overall the summer has been mild and rainy, but it feels like all the heat and humidity has been crammed into this past week. Despite the sunshine and 90 degree temps, I'm ready for boots! And that means it's also time for boot cuffs! Bear with me, since this is the first pattern I've actually designed and then attempted to write it down in such as way that others can understand it. I tried to take pictures at each step, but I make no promises of the quality.
One quick request: By all means use this to make boot cuffs for yourself or to give as gifts (Christmas will be here sooner than I realize!), but please don't sell these! If you want the boot cuffs but don't want to do the work, you can buy them from me (https://www.etsy.com/listing/121830541/crocheted-boot-cuffs)
Feel free to comment with questions and/or comments and/or pictures of your boot cuffs!
Materials: Worsted Weight Yarn, Size J hook
Stitches: sc, slip stitch, hdc, dc, fpdc, bpdc
(Don't worry, they're not as complicated as the abbreviations look!)
 |
| On the left: Cuff with scalloped edge. On the right: Cuff with Ripple/bumpy edge |
Chain 13
Starting in the second chain from the hook, single crochet (sc) across. 12 stitches total.
When you reach the end of the row, chain 1, turn. Repeat for +/- 38 rows.
(I use 38 rows for a "generic" size boot cuff, but you can make them smaller or larger as needed.)
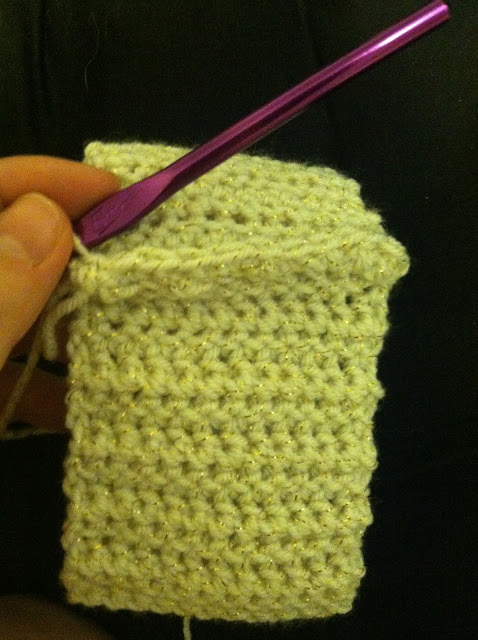
When you're done, it looks like a short scarf.
When you're cuff is long enough (it will fit around your leg without needing to stretch too much or being too loose), chain one. Without finishing off, slip stitch row 1 to row 38 across.
It should look like this when you get across.
Chain 1, sc across the top edge in the end stitches of each row.
When you have made your way around (+/- 38 stitches) (I never count), join to the chain 1 you began the edging with.
I use one of two edgings for my boot cuffs. I'll show you both, starting with the scalloped edge.
Chain 3, skip one sc, slip stitch to next sc. Repeat around. If you end up with an extra space, you can either make an extra chain 3 loop OR make one chain 4 and skip two stitches. It won't make a huge difference.
Chain 1. Sc, hdc, dc, hdc, sc in each chain 3 loop around (5 stitches in each loop).
When you reach the end, slip stitch to chain 1. Fasten off, weave in ends, turn the boot cuff right side out (so the seam is hidden). Tada!
 |
| Why yes, that is the 2nd season of Big Bang in the background. |
Version 2: Ripple edge (Bubble edge? Poofy edge? Traditional Sock edge? I really need to work on naming things better!)
This is what the cuff should look like after you finish the sc along the top edge.
Note: I'll be honest, I can't ever remember which is fpdc and which is bpdc, but alternate in each sc along the top edge. Basically, you are adding a dc around the body of the sc, either in front of the stitch or behind. I tried to get good photos, but I'm not sure how successful I was.
Chain 2. Fpdc, bpdc around. Join to chain 2.
You should have a good bumpy pattern going. When you reach the end of the row, chain 2.
Fpdc in fpdc, bpdc in bpdc around. Join to chain 2. Fasten off, weave in ends, turn right side out.
 |
| This is after the first row of fpdc/bpdc. You can see the "bumps" forming. This is what you want. |
Stay Crafty!
CR


No comments:
Post a Comment